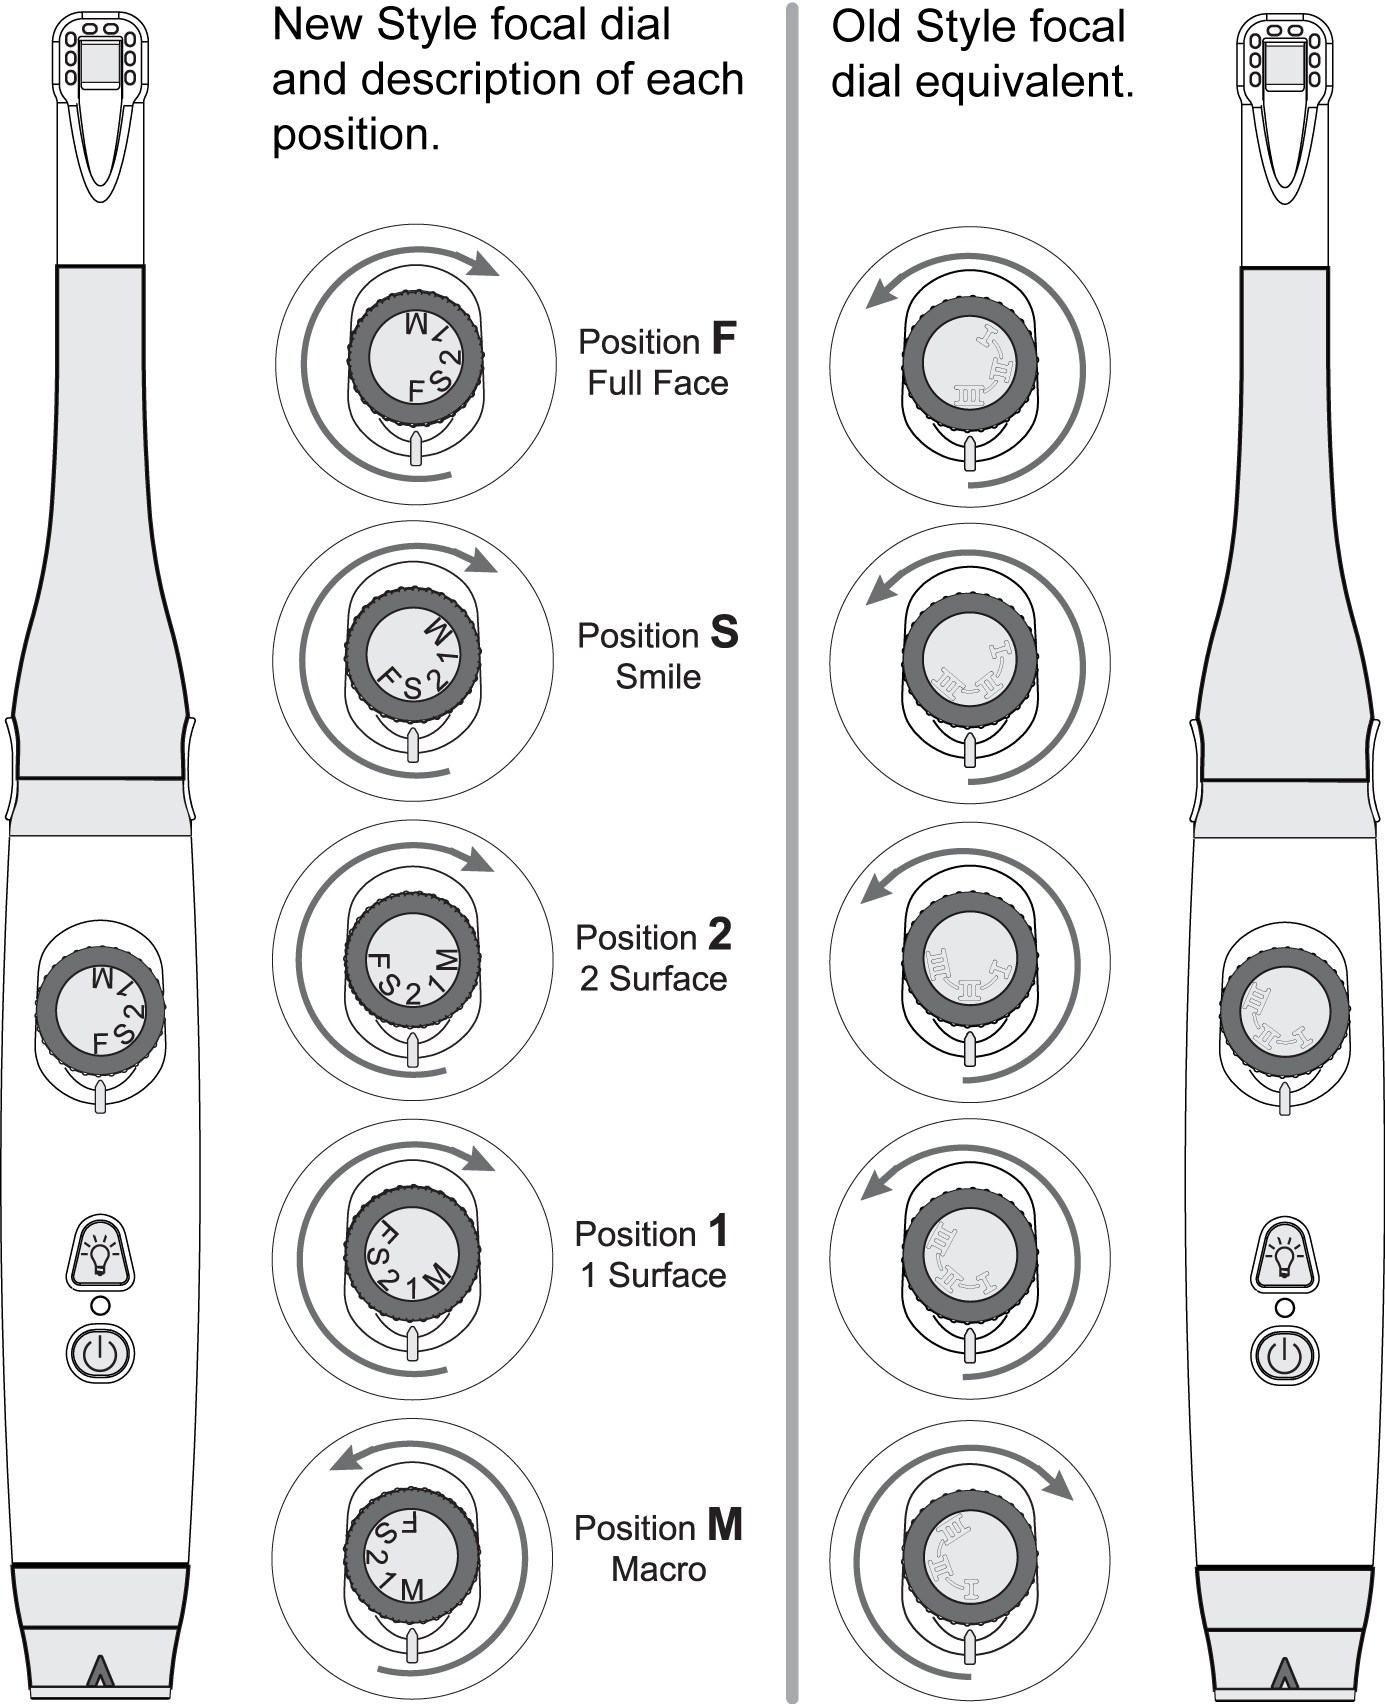
To assist in making the IRIS camera as user friendly as possible, Digital Doc has revised the dial text to represent the 5 separate focal positions: F S 2 1 and M.
This replaces the Roman numerals found on the original dial.

To assist in making the IRIS camera as user friendly as possible, Digital Doc has revised the dial text to represent the 5 separate focal positions: F S 2 1 and M.
This replaces the Roman numerals found on the original dial.
![]()
NOTICE: This model is not compatible with Windows 64 bit Operating Systems
Driver Downloads:
Eaglesoft 12.0 or higher
Schick CDR 3.5 (Requires AutoHotKey Custom Script for capture. Extract the file to “C:\Documents and Settings\All Users\Start Menu\Programs\Startup” and run the exe file to load)
Dentrix Image 4.5 (Please note that Dentrix Image 4.5 does NOT support Windows Vista or Windows 7 operating systems. This may cause issues with the proper operation of the camera)
Easy Image (Please note that Easy Image 4.5 does NOT support Windows Vista or Windows 7 operating systems. This may cause issues with the proper operation of the camera)
Kodak Digital Imaging – Must have STV third party hardware license from Kodak (Requires AutoHotKey Custom Script for capture. Extract the file to “C:\Documents and Settings\All Users\Start Menu\Programs\Startup” and run the exe file to load)
Tigerview (install “dual” function button service)
Visix (install “dual” function button service)
![]()
Spend less time installing your Icon Camera…
The Iris Setup Program is compatible with the Icon Camera and greatly simplifies the previous method of device installation.
Simply choose your Imaging Software from a list of compatible applications, and all video and capture settings will be set correctly.
Click Here for the Installer
Compatible with: Windows 10; Windows 8, 8.1; Windows 7.
(The installer can be used for both new and existing installations; it is currently shipping with all new Iris cameras)
Click the image below to automate your installations…

Downloads for manual installations can still be found below…
The following are downloads for manual installations, for easier Installation, use the Iris Camera automatic installer. Click Here for the Installer
3.0.0.9.1304 (32 Bit OS) – Video and VirtGP (All supported software except Dentrix Image/Easy Image)
3.0.0.9.1304 (Dentrix – 32 Bit OS) – Video and VirtGP (Dentrix Image; also used for Easy Image)
Older downloads listed by software name:
Schick CDR 3.5 (Requires AutoHotKey Custom Script for capture. Extract the file to “C:\Documents and Settings\All Users\Start Menu\Programs\Startup” and run the exe file to load)
DexImage 7.0.6
Dentrix Image 4.5 (Please note that Dentrix Image 4.5 does NOT support Windows Vista or Windows 7 operating systems. This may cause issues with the proper operation of the camera)
Easy Image 4.5 (Please note that Easy Image 4.5 does NOT support Windows Vista or Windows 7 operating systems. This may cause issues with the proper operation of the camera)
Kodak Digital Imaging 6.1.0.0 – Must have STV third party hardware license from Kodak (Requires AutoHotKey Custom Script for capture. Extract the file to “C:\Documents and Settings\All Users\Start Menu\Programs\Startup” and run the exe file to load)
Tigerview 7.0.12 (install “dual” function button service)
Visix 2.0.0 (install “dual” function button service)
Romexis 2.3.1 (install “dual” function button service) (Requires AutoHotKey Custom Script for capture. Extract the file to “C:\Documents and Settings\All Users\Start Menu\Programs\Startup” and run the exe file to load)
Looking for 64-bit drivers?
Use the 64-bit Installer from the Iris Installer page…
You can also still download from the (manual) 64-bit driver page.
Download the Icon Camera Uninstall Utility
1. Extract uninstall.zip file to your computer.
2. Double-click the “USB_Uninst.exe” file.
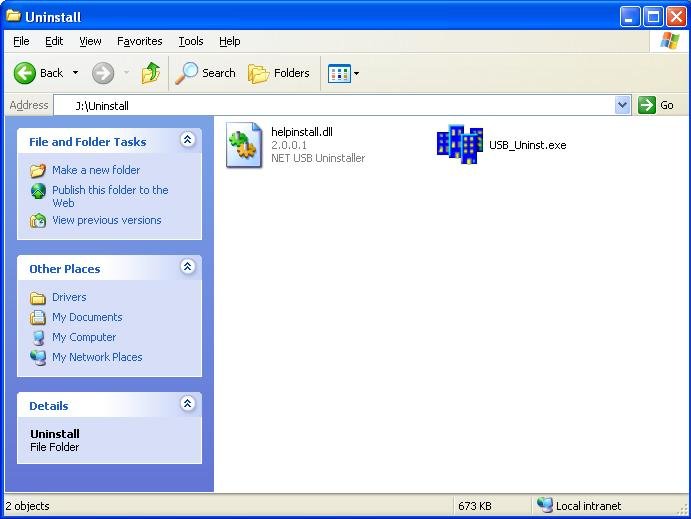
3. With camera connected click the “Uninstall” button. Unplug camera after utility completes running.
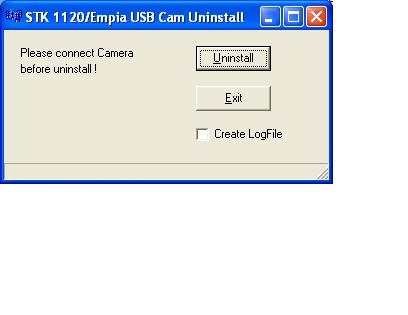
Download the IRIS Camera Uninstall Utility
1. Extract uninstall.zip file to your computer.
2. Double-click the “USB_Uninst.exe” file.
3. With camera connected click the “Uninstall” button. Unplug camera after utility completes running.
A green screen in place of a live video feed is an indicator that the Iris Camera is not receiving adequate power.
The camera’s cable could have sustained damage, testing the Iris camera with a second cable may rectify the issue.
If you encounter an ‘Open_Cam’ error in conjunction to a green screen, that is another indicator that the power supplied is insufficient.
These errors may be caused by power management settings in the Windows Operating System.
The USB Selective Suspend setting can be disabled using a tool included with the Iris Camera Installer called “USB Power Management”.
This tool can be found in: Start Menu>Programs>Digital Doc>Utilities>USB Power Management.
Another cause could be related to the power supplied from the USB port itself.
Digital Doc recommends connecting the Iris Camera through an externally powered USB hub.
These hubs are available for purchase through major dental distributors. Not all hubs are created equal,
please contact your preferred dental supplier for more information on Digital Doc USB Hubs (Part#: 4011565)
If the green screen issue persists after these troubleshooting steps, please contact Digital Doc Support and speak with a representative to arrange repair for your Iris Camera.
Try removing any other USB devices plugged into computer.
All USB ports on a system share an alotted power “pool.”
Try an alternate USB port on computer, preferably on the back of the tower.
Ports on monitors, front of computer, etc. are often underpowered.
These errors may be caused by power management settings in the Windows Operating System.
The USB Selective Suspend setting can be disabled using a tool included with the Iris Camera Installer called “USB Power Management”.
This tool can be found in: Start Menu>Programs>Digital Doc>Utilities>USB Power Management.
Another cause could be related to the power supplied from the USB port itself.
Digital Doc recommends connecting the Iris Camera through an externally powered USB hub.
These hubs are available for purchase through major dental distributors. Not all hubs are created equal,
please contact your preferred dental supplier for more information on Digital Doc USB Hubs (Part#: 4011565)
If the issues persist after these troubleshooting steps, please contact Digital Doc Technical Support and speak with a Representative to arrange the Iris Camera to be repaired.
A black screen generally means that the application is not recognizing a signal from the camera.
Check to make sure that the camera is attached to computer and powered on.
If unsure, remember that the camera’s LEDs always illuminate during the initial powering on of unit.
Check to be sure that the camera is the selected/preferred windows video device.
This can be done in videoview > devices > Iris
Be sure that the video settings are properly configured. This can be done in VideoView and/or your imaging software.
Some software applications require that you direct their input to a specific video device or driver.
Refer to specific software setup instructions if unsure about this.
Some applications will display a black, blue or green screen if a video capture card is installed.
Capture cards can sometimes be successfully disabled in device manager–reboot to be sure.
Otherwise, device needs to be removed in device manager, then physically removed from system.
This can be sometimes attributed to the hardware acceleration settings of the video controller.
This has presented itself in computers using an ATI video cards, Macintosh computers running Windows, and in Dimaxis software.
A symptom of this sometimes has been a frame of video only when the capture button is depressed.
Hardware acceleration is automatically disabled by using the Iris Camera Installer and can be Manually disabled using a utility from Microsoft DXCPL by unchecking ‘Use Hardware Acceleration’ under the ‘DirectDraw’ tab.