Download the Icon Camera Uninstall Utility
1. Extract uninstall.zip file to your computer.
2. Double-click the “USB_Uninst.exe” file.
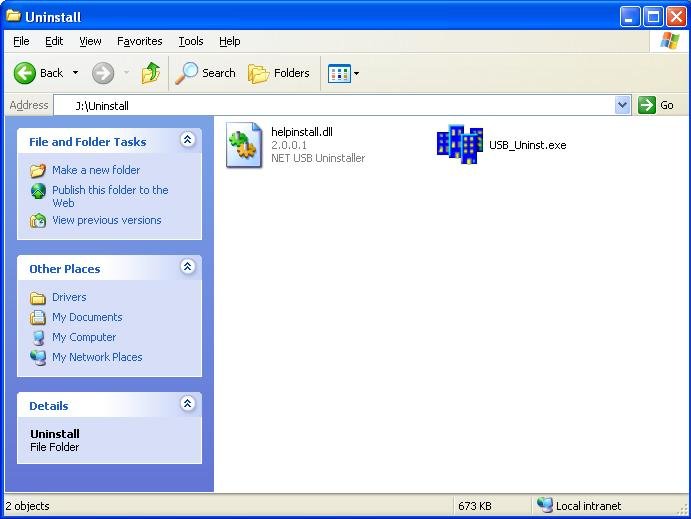
3. With camera connected click the “Uninstall” button. Unplug camera after utility completes running.
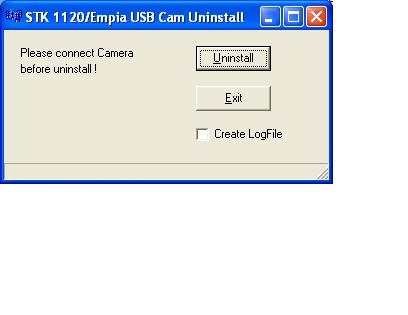

Download the Icon Camera Uninstall Utility
1. Extract uninstall.zip file to your computer.
2. Double-click the “USB_Uninst.exe” file.
3. With camera connected click the “Uninstall” button. Unplug camera after utility completes running.
A green screen in place of a live video feed is an indicator that the Iris Camera is not receiving adequate power.
The camera’s cable could have sustained damage, testing the Iris camera with a second cable may rectify the issue.
If you encounter an ‘Open_Cam’ error in conjunction to a green screen, that is another indicator that the power supplied is insufficient.
These errors may be caused by power management settings in the Windows Operating System.
The USB Selective Suspend setting can be disabled using a tool included with the Iris Camera Installer called “USB Power Management”.
This tool can be found in: Start Menu>Programs>Digital Doc>Utilities>USB Power Management.
Another cause could be related to the power supplied from the USB port itself.
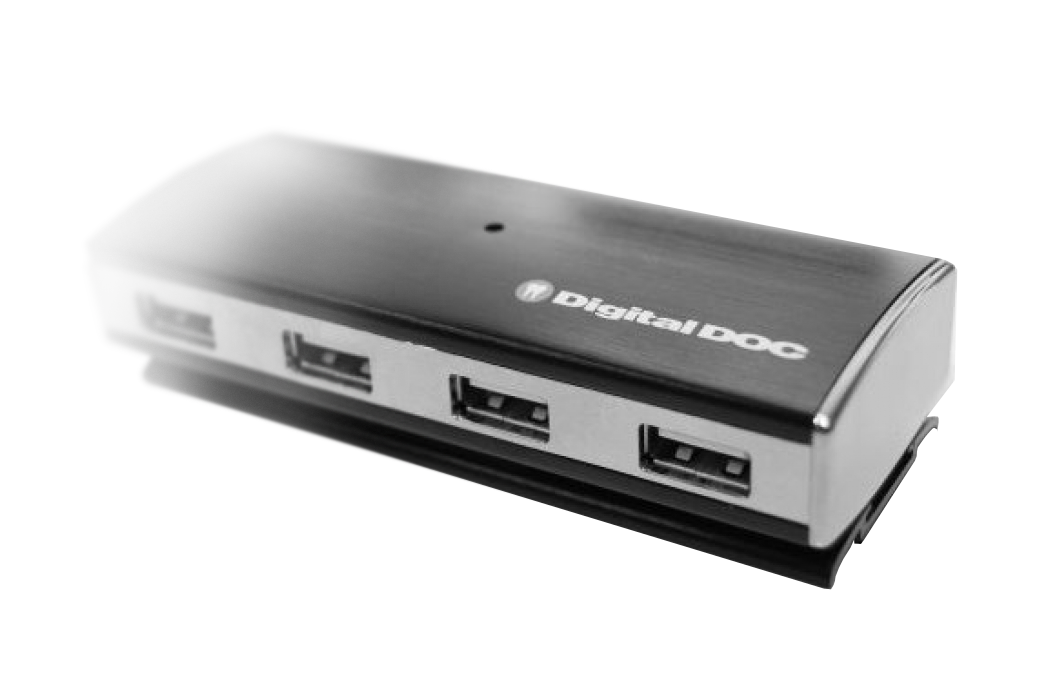
Digital Doc recommends connecting the Iris Camera through an externally powered USB hub.
These hubs are available for purchase through major dental distributors. Not all hubs are created equal,
please contact your preferred dental supplier for more information on Digital Doc USB Hubs (Part#: 4011565)
If the green screen issue persists after these troubleshooting steps, please contact Digital Doc Support and speak with a representative to arrange repair for your Iris Camera.
Try removing any other USB devices plugged into computer.
All USB ports on a system share an alotted power “pool.”
Try an alternate USB port on computer, preferably on the back of the tower.
Ports on monitors, front of computer, etc. are often underpowered.
These errors may be caused by power management settings in the Windows Operating System.
The USB Selective Suspend setting can be disabled using a tool included with the Iris Camera Installer called “USB Power Management”.
This tool can be found in: Start Menu>Programs>Digital Doc>Utilities>USB Power Management.
Another cause could be related to the power supplied from the USB port itself.
Digital Doc recommends connecting the Iris Camera through an externally powered USB hub.
These hubs are available for purchase through major dental distributors. Not all hubs are created equal,
please contact your preferred dental supplier for more information on Digital Doc USB Hubs (Part#: 4011565)
If the issues persist after these troubleshooting steps, please contact Digital Doc Technical Support and speak with a Representative to arrange the Iris Camera to be repaired.